The step-by-step process of borehole drilling in Kenya starts long before a rig moves, and it finishes long after water reaches the surface. It opens with land documents and two regulatory approvals. It closes with a metered, pressurised supply that a trained operator can run unaided. Eighteen defined steps sit between those two points, grouped in six phases.
Most budgets are written for the hole alone. However, the phases before mobilization decide whether the borehole is lawful, and the phases after it decide whether the water ever reaches a tap. This guide sets out every phase in order, with the deliverable each stage produces.
Phase 1: Documentation and Regulatory Approvals
Nothing is drilled in this phase. First the documents are assembled, then the two regulators are engaged, and finally every approval is verified before machinery moves.
Step 1: Documentation and project planning
- Obtain land ownership documents, or written consent from the landowner.
- Identify the proposed borehole location and state the project objective.
- Prepare the project concept, the estimated water demand and a preliminary budget.
- Engage qualified hydrogeological and drilling professionals. Start with the Groundwater Hydrogeological Survey in Kenya.
- Finally, compile the documents that each regulatory application will require.
Step 2: NEMA environmental assessment and approval
Environmental screening precedes heavy machinery. Specifically, an approved expert assesses what the project may do to the surrounding land and community.
- Engage a NEMA-licensed environmental assessment expert where the project requires one.
- Then conduct environmental screening and assessment of the proposed site.
- Identify potential environmental and social impacts.
- Prepare and submit the applicable environmental assessment report.
- Obtain the NEMA approval or licence before commencing any activity that requires it.
The regulator publishes its current requirements at NEMA Kenya. Therefore, confirm them there rather than from a contractor’s checklist.
Step 3: WRA permit and water resource authorisation
The Water Resources Authority is the relevant water-resource regulator in Kenya. Consequently, its authorisation governs both the drilling and the abstraction that follows.
- Apply to the Water Resources Authority for the applicable authorisation.
- Submit the hydrogeological survey report together with the other technical documents.
- Obtain approval for borehole drilling and for water abstraction as applicable.
- Confirm any conditions relating to the permitted abstraction rate, monitoring and reporting.
Step 4: Regulatory compliance and pre-drilling verification
Verification protects the investment already spent on approvals. Before mobilisation, check that nothing is still outstanding.
- Verify that every required permit and approval is in place.
- Confirm the drilling contractor’s qualifications and equipment readiness.
- Next, review the approved drilling programme and the site safety plan.
- Confirm access, site boundaries and the arrangements for managing drilling waste.
County approvals can apply in addition to the national ones. For this reason, settle the exact sequence and document list with NEMA and WRA before mobilising. Skipping it is the costliest way to learn the step-by-step process of borehole drilling.
Phase 2: Site Preparation and Borehole Drilling
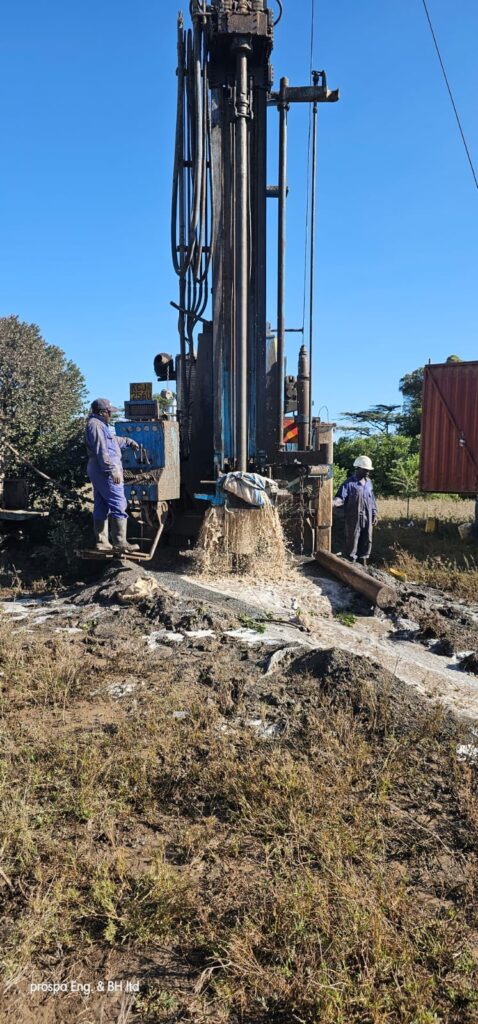
This phase turns an approved point on a map into a stable, cased hole. First the rig arrives, then the hole is drilled and logged, and finally it is cased, packed and sealed. It is the longest stretch of the step-by-step process of borehole drilling, and five steps cover it.
Step 5: Mobilization to site
- Transport the drilling rig, compressor, drilling rods, tools and support equipment to the site. The equipment side of this stage is covered in Drilling Equipment Mobilization in Kenya.
- Prepare the drilling pad and ensure safe access for machinery.
- Establish a water supply for drilling and provide suitable waste containment.
- Position the rig at the approved drilling point and conduct safety checks.
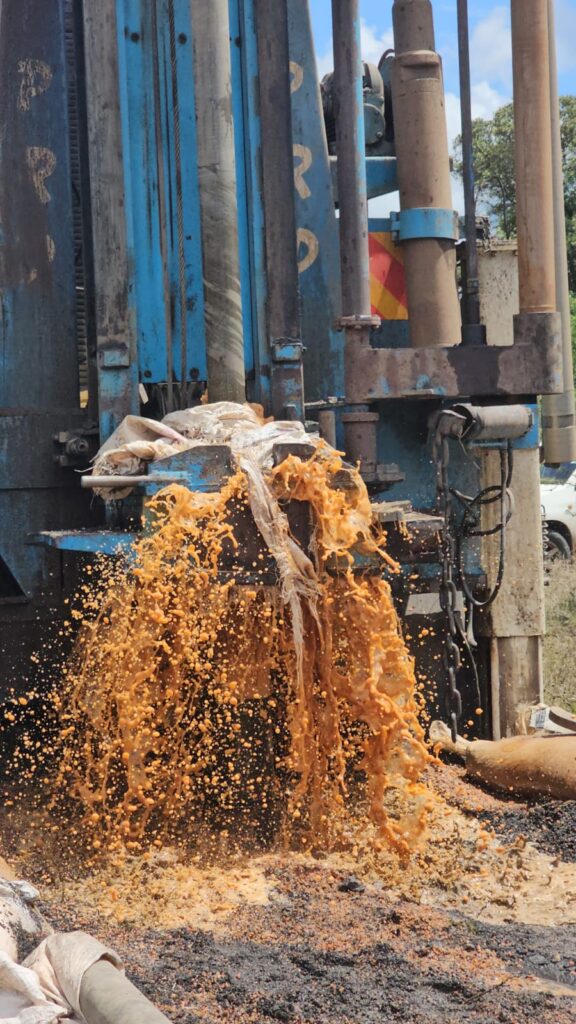
Step 6: Borehole drilling
Drilling is a recording exercise as much as a digging one. Then the geological findings decide how the hole is built.
- Drill to the approved depth using the appropriate drilling method.
- Record geological formations, depth intervals and water strikes.
- Also, monitor drilling progress, borehole stability and water inflows.
- Maintain an accurate drilling log.
- Determine the final depth and construction requirements from the geological findings.
Step 7: Casing and screen installation
- Install casing pipes to support the borehole and prevent collapse.
- Install screened sections opposite the identified water-bearing formations.
- Use the casing materials and diameters specified in the borehole design.
- Ensure that joints are secure and the casing is properly aligned.
Step 8: Gravel packing
The gravel pack does two jobs at once. It filters fine material, and it holds the formation steady against the screen.
- Place clean, appropriately graded filter gravel around the screened sections.
- Install the gravel pack to the required intervals.
- Prevent contamination of the gravel during installation.
- Seal the upper annular space as the borehole design specifies, so surface contaminants cannot enter the aquifer.
Step 9: Top covering and borehole protection
- Install a secure temporary or permanent borehole cap.
- Construct the sanitary seal and protective apron required by the design.
- Provide drainage away from the borehole head.
- Protect the borehole from surface runoff, debris, animals and unauthorised access.
Phase 3: Testing and Water Quality Assessment
Two steps decide whether the hole is worth equipping. First the borehole is developed, then it is pump-tested, and finally a laboratory confirms what the water actually carries.
Step 10: Borehole development and pump testing
A hole that yields water is not yet a borehole that yields water sustainably. Development removes the fines that drilling left behind.
- Develop the borehole to remove drilling fines and improve water entry.
- Conduct the prescribed step-drawdown and constant-rate pumping tests, as appropriate.
- Measure discharge, static water level, pumping water level and drawdown.
- Monitor recovery after pumping stops.
- Prepare a pump-test report showing the sustainable yield and the recommended abstraction conditions.
Step 11: Water quality analysis
- Collect representative water samples using proper sampling procedures.
- Submit samples to a competent laboratory for physical, chemical and microbiological analysis.
- Test relevant parameters such as pH, turbidity, electrical conductivity, dissolved solids, nitrates, fluoride and microbial contamination.
- Then compare results with applicable Kenyan drinking-water standards, especially where the water is intended for human consumption.
- Determine whether treatment or further testing is required before use.
Phase 4: Pump Sizing and Borehole Equipping
Equipping follows a fixed order. First the duty point is calculated from the test results, then the pump is lowered, and finally solar and controls are wired and proved under load.
Step 12: Pump sizing and selection
Pump sizing uses the pump-test numbers, not guesswork. As a result, the installed pump matches the aquifer instead of starving or flooding it.
- Establish the required daily water demand.
- Use the pump-test results to determine an appropriate pumping rate.
- Calculate the total dynamic head, including pumping water level, elevation difference, pipe friction and delivery pressure.
- Select a pump that operates efficiently at the required flow and head.
- Match the pump to the power supply on site and its planned operating hours. For the duty-point maths behind this, see our guide to pump selection for irrigation.
Deliverable: a pump selection report stating flow rate, total dynamic head, motor rating and recommended operating conditions.
Step 13: Pump lowering and installation
- Install the submersible pump, rising main, power cable and safety cable.
- Lower the pump to the approved installation depth, keeping the required clearance above the borehole bottom.
- Fit suitable non-return valves and headworks connections.
- Install the control equipment and verify electrical insulation and cable connections.
- Test pump operation and confirm the discharge rate.
Step 14: Solar installation
Solar power suits sites where grid electricity is absent or unreliable. However, the array must be sized against the pumping duty, not against a rule of thumb.
- Calculate the energy required for daily water pumping.
- Size the solar panels, mounting structures, pump controller and associated electrical equipment.
- Install the panels in a suitable location with minimal shading.
- Configure protection, earthing and cable connections.
- Test the system under operating conditions and confirm that it delivers the required water volume.
- Include batteries only where the selected system design requires them.
For the system options and their trade-offs, read Solar Powered Irrigation Systems in Kenya.
Step 15: Electrical works and controls
- Install the pump control panel, isolators, circuit protection and appropriate cabling.
- Provide proper earthing and surge or lightning protection.
- Install dry-run protection and other necessary pump safety controls.
- Test the controller, sensors and protective devices.
- Ensure all works comply with applicable electrical safety requirements.
Phase 5: Water Storage, Metering and Distribution
This part of the step-by-step process of borehole drilling ends with water at a tap, not underground. First the storage and the elevation are designed, then the network is laid, and finally it is flushed, pressure-tested and metered.
Step 16: Water tower design and construction
Elevation is what turns stored water into pressure. Therefore the tank size and the tower height are designed together, against demand.
- Calculate storage requirements from daily demand, pumping hours and supply reliability.
- Determine the required tank capacity and elevation from the intended distribution pressure.
- Design the tower foundation, columns, bracing and tank support.
- Obtain the necessary structural design and approvals.
- Construct the tower, install the tank and provide safe access, overflow, drainage and inspection provisions.
- Test the completed structure and verify that it meets the design requirements.
Reservoir and tank work is a discipline of its own; the builders who do it are covered in Irrigation Reservoir Construction Companies.
Step 17: Water metering and distribution network
- Design the mainline, submains and distribution pipelines to the required flow and pressure.
- Install isolation valves, distribution fittings and meters at suitable locations.
- Provide individual or bulk metering according to the project requirements.
- Install drainage points, air-release valves and other necessary pipeline accessories.
- Flush the pipelines, then carry out pressure and leakage tests and commission the network.
- Establish a water allocation, monitoring and maintenance plan.
Where the distribution network feeds crops rather than a household, the field layout follows the drip irrigation system in Kenya design.
Phase 6: Commissioning, Handover and Ongoing Support
Commissioning proves the whole system together. First each component is tested on its own, then they are run as one supply line, and finally the paperwork and the training are handed over.
Step 18: Final commissioning and project handover
- Verify that the borehole, pump, solar system, electrical controls, storage tank and distribution network operate together correctly.
- Confirm that the delivered flow rate and water quality meet the intended use.
- Submit the borehole completion report, drilling log, pump-test report and laboratory results.
- Hand over equipment manuals, warranties, permits and maintenance schedules.
- Train the operator on pump operation, water metering, routine maintenance and fault reporting.
- Establish a monitoring programme for water levels, abstraction volumes and system performance.
Handover is not the end of the step-by-step process of borehole drilling. Boreholes still need scheduled servicing to prevent blockages, pump failures and contamination, and rehabilitation restores a hole whose output has fallen.
Step-by-Step Process of Borehole Drilling: Phase Summary Table
The table below maps the step-by-step process of borehole drilling to what you actually hold at the end of each phase. Specifically, it separates the approvals from the works, because the two are bought from different suppliers.
| Phase | Steps | Deliverable you hold at the end |
|---|---|---|
| 1. Documentation and approvals | 1 to 4 | Permits, approvals, verified contractor |
| 2. Site preparation and drilling | 5 to 9 | Cased, gravel-packed, sealed borehole |
| 3. Testing and water quality | 10 to 11 | Pump-test report and laboratory results |
| 4. Pump sizing and equipping | 12 to 15 | Pump running on power, with controls |
| 5. Storage, metering, distribution | 16 to 17 | Pressurised, metered network |
| 6. Commissioning and handover | 18 | Completion report, trained operator |
Permits Inside the Step-by-Step Process of Borehole Drilling
Three approval tracks run in parallel, and they are not interchangeable. NEMA governs the environmental assessment. WRA governs the water resource and the abstraction. In addition, county governments can require their own permits.
Conditions attached to an authorisation matter as much as the document itself. Therefore, read the permitted abstraction rate, the monitoring duty and the reporting duty before you budget. A borehole drilled to one consent and run beyond it is exposed on inspection.
Cost Drivers in the Step-by-Step Process of Borehole Drilling
Price follows the geology and the scope, not the acreage. Specifically, five items move the total:
- Depth and formation – hard rock needs different bits, more time and higher casing costs.
- Yield required – a higher abstraction rate means a larger pump test and a bigger duty point.
- Power choice – grid, solar or generator each carry different equipment and control costs.
- Storage and elevation – tower height and tank capacity are structural works in their own right.
- Approvals – assessment and application fees, plus any conditions they impose.
Our main service page explains how these factors combine into a rate, in Borehole Drilling in Kenya.
Who Runs the Step-by-Step Process of Borehole Drilling for You?
Eunidrip Irrigation Systems works across the whole sequence, from survey and approvals to equipping, storage and handover. We operate nationwide, including Nairobi, Nakuru, Kisumu, Mombasa and rural counties.
For project-specific work in the Rift Valley, see Borehole Drilling in Nakuru, and in Laikipia County see Borehole Drilling Company in Rumuruti.
To discuss a project, call +254 728 163329.
Frequently Asked Questions about the Step-by-Step Process of Borehole Drilling
What is the first step in the step-by-step process of borehole drilling?
Documentation comes first. You need proof of land rights, or the landowner’s written consent, before any application can proceed. Then the project concept, water demand and budget are set out.
Do I need both a NEMA approval and a WRA permit?
Typically yes, where the project triggers an environmental assessment and abstraction of water. They govern different things, so one does not substitute for the other. Confirm the exact requirements for your site with each regulator.
How long does pump testing take?
It depends on the aquifer and the test the regulator or hydrogeologist specifies. Step-drawdown and constant-rate testing each take hours of continuous pumping, and recovery monitoring follows them. Consequently, pump testing is scheduled rather than assumed.
Can solar power be added after the borehole is equipped?
Yes, and it often is. However, the array, controller and cable sizing must match the pump duty established during testing. Rather than fitting panels to an existing pump, size both against the same duty point.
What documents should the contractor hand over at completion?
A completion report, the drilling log, the pump-test report and the laboratory water-quality results. Equipment manuals, warranties, permits and maintenance schedules should follow them.
Does a borehole need ongoing maintenance after handover?
Yes. Blockages, pump failures and contamination all develop quietly over time. Scheduled servicing keeps the output the test report predicted, and rehabilitation restores a borehole whose yield has already fallen.