

Step by Step Greenhouse Construction in Kenya
Greenhouse construction is taking shape as the backbone of modern farming in Kenya. Unlike open-field farming, a greenhouse protects crops from excessive rainfall, strong winds, pests and sudden temperature changes. As a result, farmers produce healthier crops with better yields and improved quality. This guide walks through greenhouse construction step by step, from choosing the site to switching on the drip lines.
A well-planned greenhouse should be strong enough to withstand local weather while providing good ventilation, even light and efficient water management. Every stage of greenhouse construction, from selecting the site to installing the cover, affects how the structure performs. Therefore, skipping or rushing a step usually shows up later as torn film, a leaning frame or waterlogged beds.
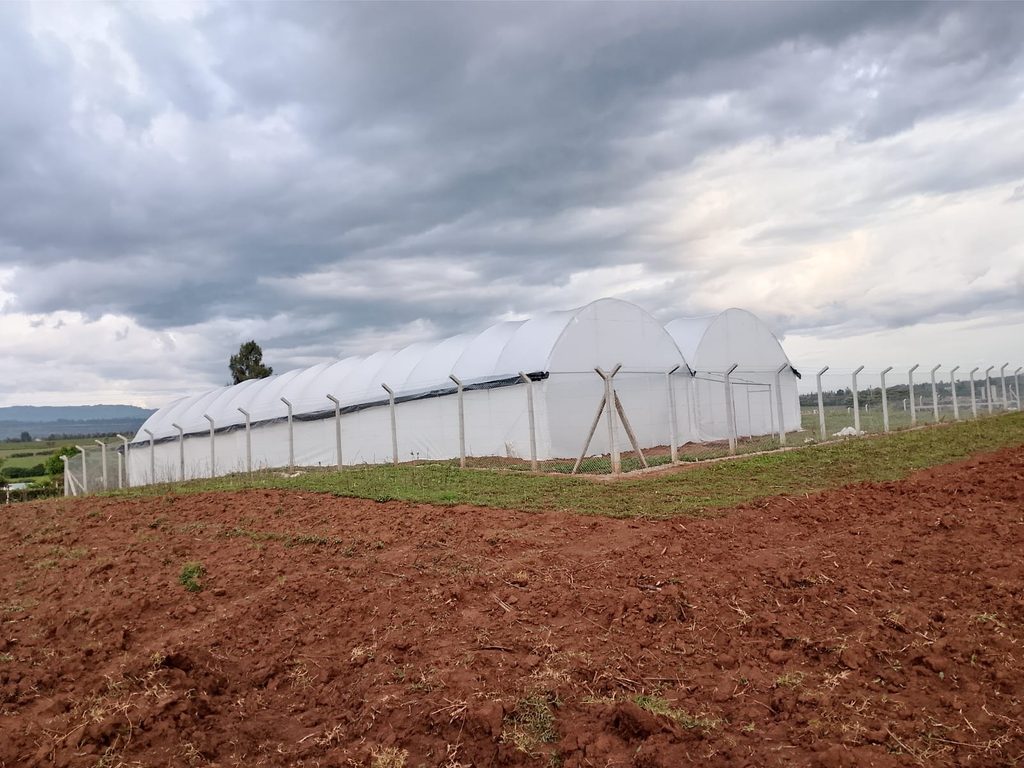
Before Greenhouse Construction Begins: Site Selection and Soil Testing
First, choose the ground carefully. An ideal greenhouse site should have:
- Good sunlight throughout the day.
- A reliable water supply within easy reach.
- Well-drained soil that does not stay wet after rain.
- Easy access for vehicles and workers.
- Natural protection from strong winds where possible.
- Enough space for future expansion.
However, avoid areas that remain waterlogged after rainfall. Excess moisture around the foundation weakens the structure over time and encourages soil-borne disease in the beds.
Water availability
A greenhouse depends almost entirely on irrigation because rainfall does not reach the crops inside. Therefore, identify a reliable water source before construction begins, such as a borehole, well, river line or storage tank. Adequate storage matters most in dry seasons when irrigation demand rises.
Accessibility
The greenhouse should be easy to reach all year round. In practice, this eases delivery of inputs, harvest collection and the daily movement of workers.
Soil testing
Next, test the soil before greenhouse construction starts. A basic test covers soil pH, texture, nutrient levels and drainage. The results guide bed preparation, fertiliser planning and, in some cases, whether to grow in soil or in raised media.
Step 1: Site Survey and Marking
Then, before excavation begins, measure and mark the greenhouse layout. Important measurements include length, width, door position, ventilation openings and foundation points. Use measuring tapes, pegs and builder’s lines to keep alignment accurate.
Also, orient the structure with care. In most of Kenya, an east-west ridge gives even light across the beds, while the long side should face away from the prevailing wind. Proper marking simplifies the installation of structural members during later stages, so take time here.
Step 2: Greenhouse Construction Foundations (Concrete vs Earth Anchor)
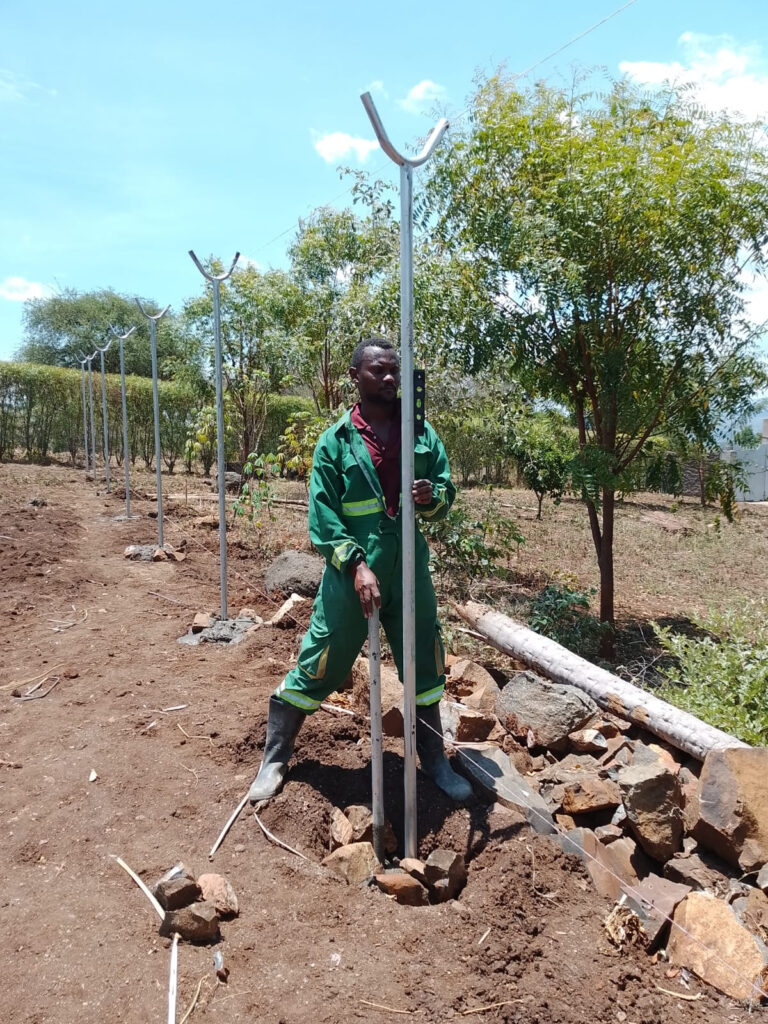
Once the site is selected, tested and cleared, prepare the foundation that will support the frame. The frame carries the weight of the structure. However, the foundation transfers that weight to the ground and keeps the greenhouse stable during strong winds and heavy rain.
In practice, a greenhouse foundation supports the frame, prevents movement in wind, keeps the structure level, reduces stress on steel or timber, and keeps doors and vents aligned. Without a stable foundation, the frame gradually shifts and the cover loosens or tears.
| Foundation type | How it is built | Best suited to | Main advantages |
|---|---|---|---|
| Concrete footing | Excavate holes, position anchor posts or base plates, fill with concrete and let it cure | Permanent metallic greenhouses, commercial units, windy or unstable soils | Excellent stability, high wind resistance, long service life, low maintenance |
| Earth anchor | Screw or drive steel anchors into firm ground and bolt the frame to them | Smaller or relocatable tunnels on firm, well-drained soil | Faster installation, less labour, minimal excavation, easier relocation |
For example, a commercial metallic greenhouse on black cotton soil should always sit on concrete footings. Meanwhile, a small wooden greenhouse on firm ground can use treated posts set directly into the soil.
Step 3: Frame Assembly, Hoops, Purlins and Tension Braces
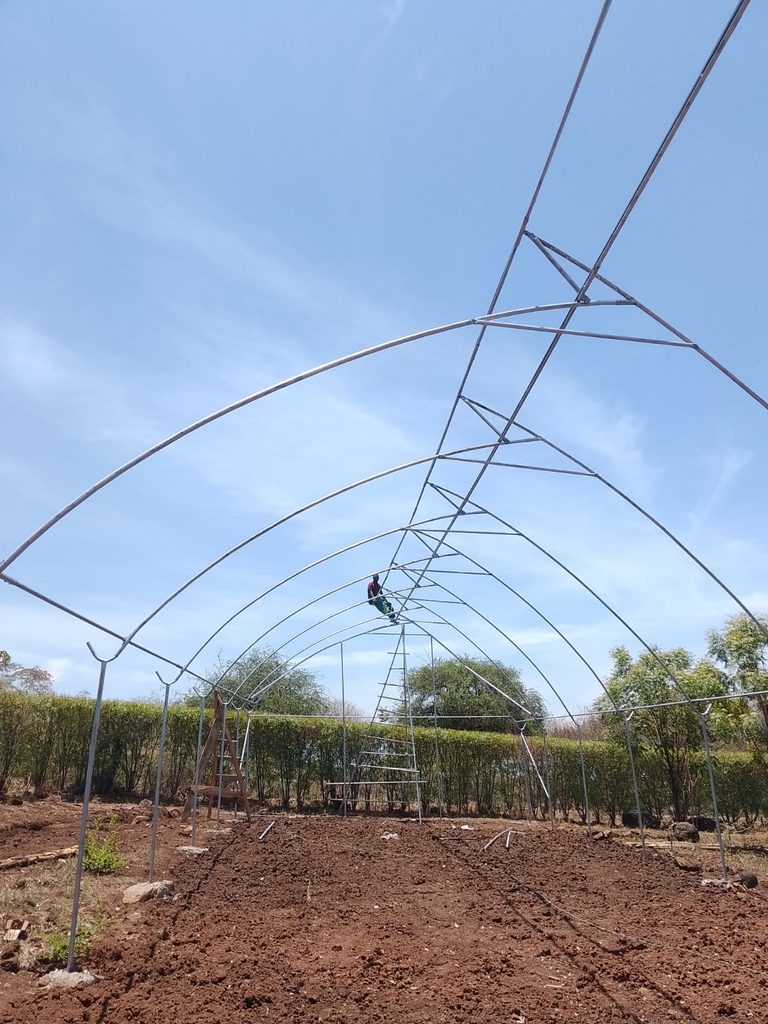
The frame forms the skeleton of the greenhouse. It supports every other component, including the cover, insect netting, irrigation lines and crop support wires. Eunidrip builds frames in both galvanised steel and treated timber.
Hoops
First, hoops are the curved members that create the arch of the greenhouse. They run from one side of the foundation to the other, forming the roof and side walls. Hoops support the roof, carry the weight of the cover, resist wind loads and hold the overall shape. Each hoop must be fixed to the foundation before other members go on. Then check vertical alignment, equal spacing, secure fastening and correct height.
Purlins
Next, purlins are horizontal members that connect adjacent hoops. They stop individual hoops moving independently and so make the frame far more rigid in wind. Most designs include a ridge purlin along the roof and side purlins along the walls. Purlins also give the film a smooth surface to rest on.
Tension braces
Finally, tension braces resist sideways movement. They are installed diagonally between structural members. Strong winds create horizontal forces that can twist the frame, and braces reduce that movement by stiffening the structure. In practice, braces improve wind resistance, prevent twisting, reduce vibration and extend the life of the greenhouse.
Alignment and fasteners
Throughout frame assembly, check for straight side walls, uniform hoop spacing, a level ridge line, tight bolts and correctly placed braces. Small alignment errors become obvious once the film goes on, so correct them early. Use galvanised bolts, nuts, washers, self-drilling screws and steel brackets. Finally, tighten every loose connection before the cover is installed.
Step 4: Installing Greenhouse Polythene Film
Always install the cover on a calm day with little or no wind. Strong wind makes it hard to stretch the film evenly and can tear it during installation.
Greenhouse polythene film is a UV-treated plastic cover made to survive outdoor conditions while letting enough light reach the crop. Unlike ordinary plastic sheet, it resists ultraviolet radiation, which extends its life to several seasons. A quality film allows light for photosynthesis, keeps rain off, reduces wind effects, helps hold temperature and limits moisture loss. Most commercial films also carry anti-drip additives that stop droplets forming on the inside surface.
Prepare the frame
Before the cover goes on, inspect the frame for sharp metal edges, protruding bolts or screws, loose fasteners, rough welds and damaged members. Sharp points puncture film during installation or as the steel expands and contracts in the heat. Where necessary, cover exposed points with greenhouse repair tape or plastic caps.
Position the film
First, unfold the film carefully to avoid stretching or tearing. Installation usually starts from one end before the sheet is pulled gradually across the roof. Avoid dragging the film over rough surfaces, keep it clean, keep it centred and prevent twisting. Uniform positioning makes tensioning easier and gives a neat finish.
Apply the correct tension
Then apply tension. Correct tension keeps the cover strong and durable. If the film is too loose, wind moves it constantly, the material wears quickly, rainwater pools on the roof and it flaps noisily. If it is too tight, it may tear, cannot expand in hot weather and wears out early. The film should be firm enough to stay stable while still allowing normal expansion and contraction with temperature.
Step 5: Securing the Film with Aluminium Profiles and Wiggle Wire
Lock channels, also called aluminium profiles with wiggle wire, are fixed to the frame along roof edges, side walls, end walls, door frames and vent openings. The spring wire presses the film firmly into the channel. This gives a strong, durable fastening and makes future film replacement simple.
Moreover, aluminium profiles are lightweight and corrosion-resistant. They hold the film strongly, last for many years, allow easy removal at replacement time and spread tension evenly across the greenhouse. Wiggle wire is inserted after the film is positioned. It is reusable for several film changes, simple to fit, holds strongly and distributes pressure evenly. For a closer look at this system, read our guide to the greenhouse film fixing system.
Step 6: Insect Netting, Vents and Doors
Ventilation regulates temperature and humidity inside the greenhouse. However, open vents also let in insects that spread disease and damage crops. Insect-proof netting allows fresh air in while keeping pests out. Fit it on side ventilation openings, end-wall vent sections and roof vents where the design includes them.
As a result, good ventilation reduces excess heat, lowers humidity, improves air circulation, supports healthy growth and cuts fungal disease. Our article on vented versus tunnel greenhouses explains how to choose between the two designs. Also, hang the doors last. A double-door entry with a netted lobby keeps pests out when workers come and go. In very hot areas, a shade net over the roof lowers midday temperature.
Step 7: Irrigation Inside the Greenhouse
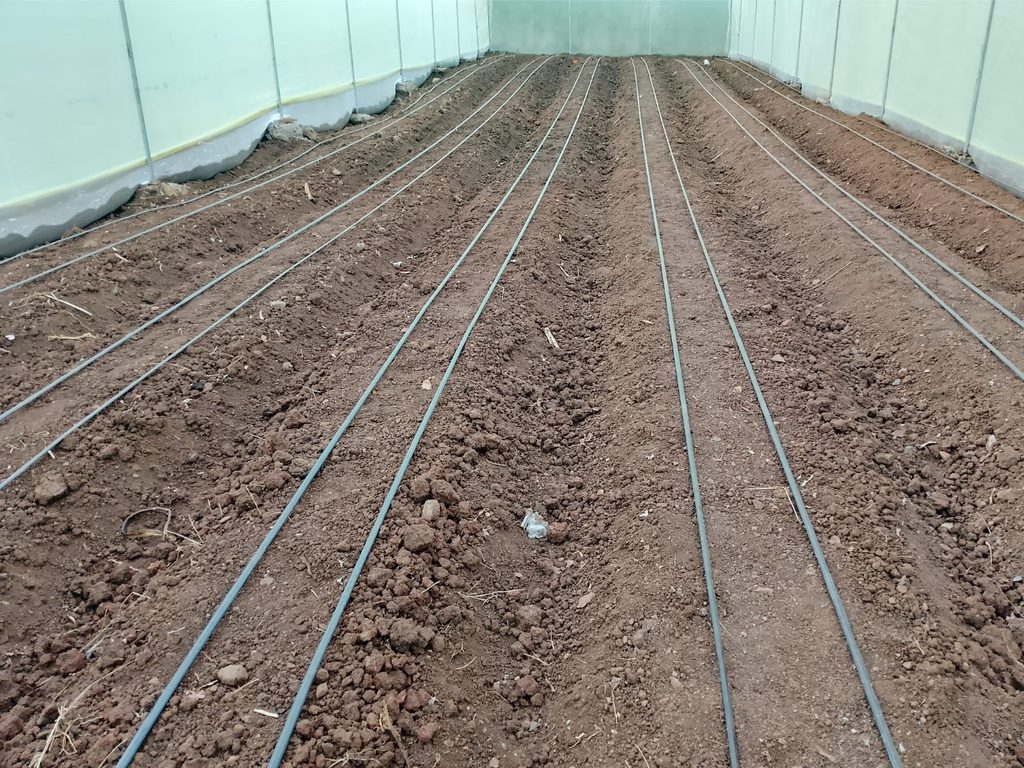
Greenhouse construction is not finished until water reaches the beds. Because rain never enters, the crop depends fully on the irrigation system. Drip is the standard choice, since it wets the root zone only, keeps leaves dry and lowers disease pressure.
Typically, a mainline enters at one end, passes through an irrigation water filter, then feeds a sub-main with a ball valve per block. From there, drip tape runs along each bed. Lay the mainline before the beds are shaped. Then test the system under pressure before planting, so leaks are fixed while the beds are still empty.
Final Inspection After Greenhouse Construction
Finally, after installation, inspect the whole structure thoroughly. Confirm that:
- The film is evenly tensioned with no wrinkles.
- Wiggle wire is fully inserted along every profile.
- Insect netting is tightly secured with no gaps.
- Doors open and close correctly and the lobby net seals.
- Ventilation openings work as designed.
- No sharp edges are touching the cover.
- Drip lines hold pressure and every bed receives water.
Then walk the structure again after the first strong wind and the first heavy rain. Small faults are far cheaper to fix in week one than in month six.
Greenhouse Construction Costs and Standard Sizes
Usually, greenhouse construction cost depends on size, frame material, cover grade and the irrigation package. Eunidrip builds standard units of 8x15m, 8x24m and 8x30m, plus custom multi-span designs. For current figures, see greenhouse prices in Kenya and the breakdown of the cost of a one-hectare greenhouse. The FAO guide to good agricultural practices for greenhouse vegetable crops is a useful reference for crop planning once the structure is up.
Greenhouse Construction Frequently Asked Questions
How long does greenhouse construction take?
A standard 8x30m tunnel usually takes five to ten working days once materials are on site. Concrete footings add two to three days for curing. Multi-span units take longer.
Which direction should a greenhouse face in Kenya?
Near the equator, an east-west ridge gives the most even light across the beds. Also, place the long side away from the prevailing wind to reduce load on the film.
Steel or wooden frame, which is better?
Typically, galvanised steel lasts longer and carries wind loads better, so it suits commercial units. Treated timber costs less upfront and works well for small tunnels on firm ground. In practice, the budget and the expected lifespan decide.
How long does greenhouse polythene last?
Usually, quality UV-treated film lasts three to five seasons. Correct tension, smooth frame edges and proper wiggle-wire fixing are what get it to the upper end of that range.
Can I build a greenhouse on sloping land?
Yes, with care. First, level the pad or terrace it, and run drainage along the uphill side. Because water inside a greenhouse must be fully controlled, a sloping floor makes even drip distribution harder.
Does Eunidrip supply materials only, or full greenhouse construction?
Both. For example, you can buy the film, profiles, nets and drip kit and build yourself, or book our team for complete greenhouse construction including the irrigation system.
Get a Greenhouse Construction Quote from Eunidrip
Eunidrip Irrigation Systems supplies every component in this guide and builds greenhouses across Kenya. Send us your plot size and location through the contact page, or browse the greenhouse farming kit for a complete package. We will advise on orientation, frame type and the right drip layout before a single peg goes into the ground.