Table of Contents
Most growers settle drip tape vs drip line once, in a shop, on a price per roll. That is the wrong order.
However, buy the wrong product and the field tells you in week three. Tape splits where a ridge settled. A line keeps running with half its emitters blocked.
Drip tape vs drip line is really a question about your plot. The crop, the row length, the water source and the seasons the tubing must survive decide it. This page works through eight checks in the order a technician would, with the figures the shop lists and the ranges published by extension services.
What the two products actually are
Two different objects, one job.
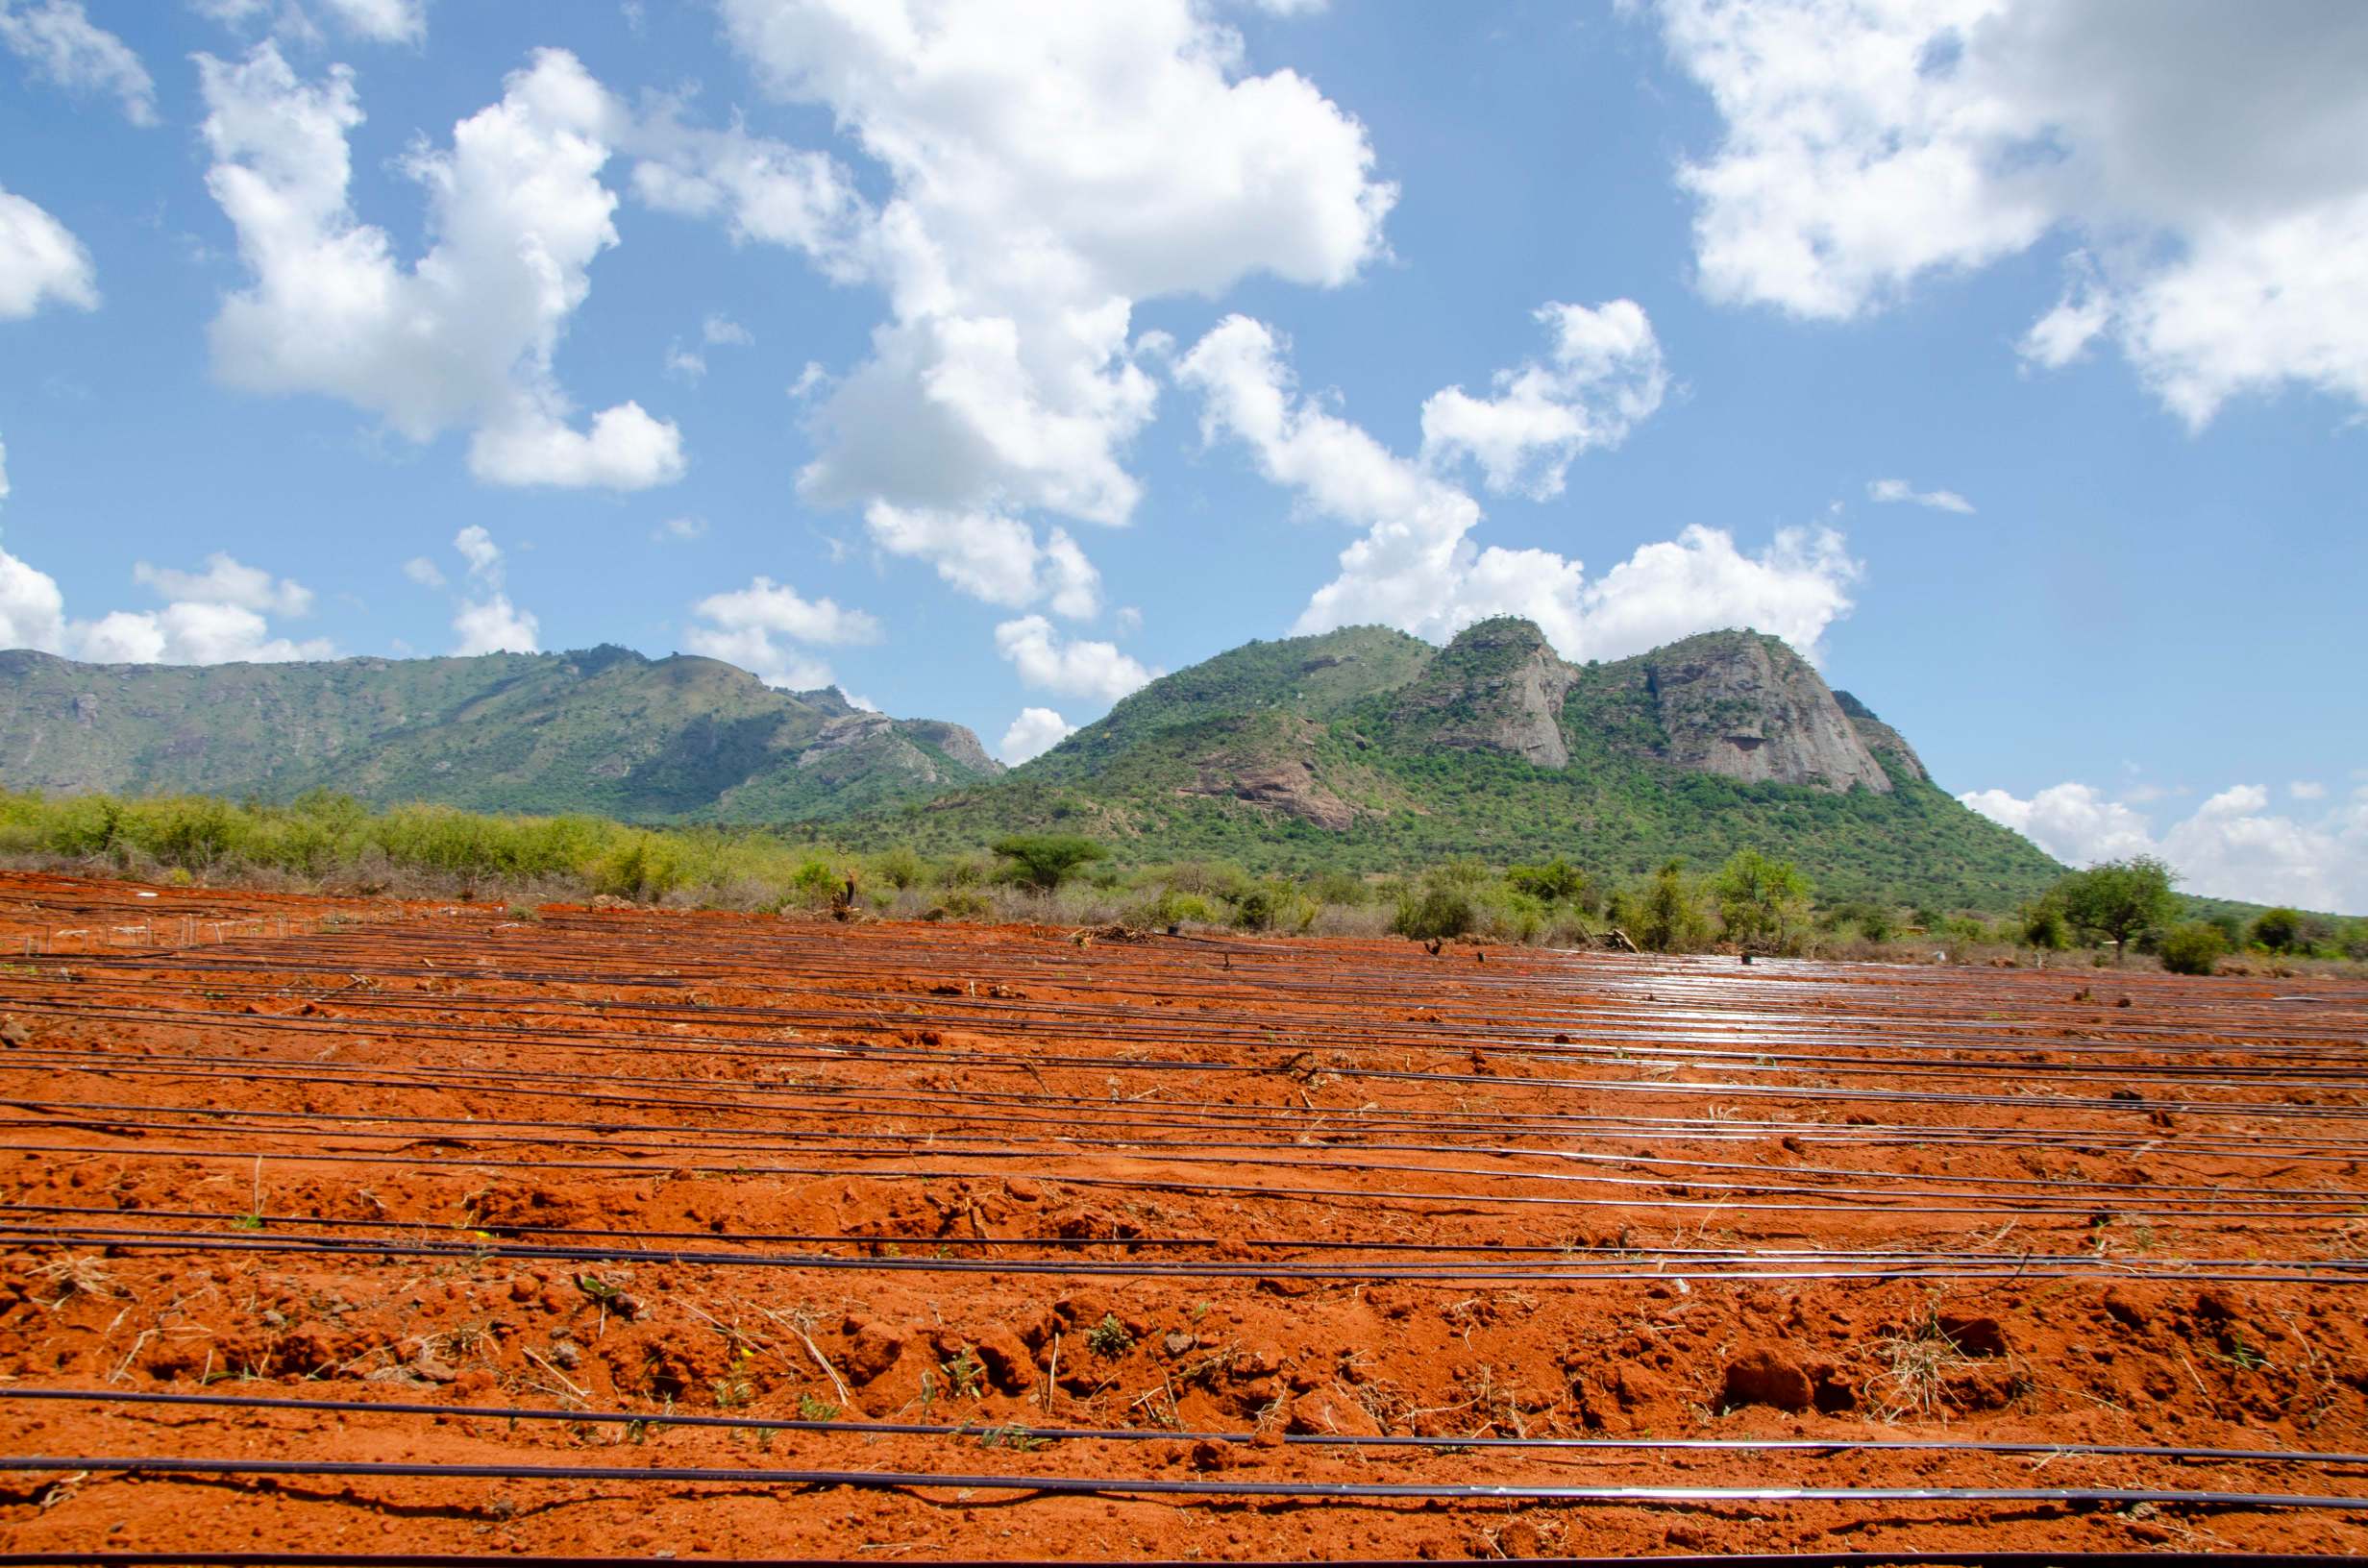
Drip tape is a flat wall of polyethylene that inflates into a tube under pressure. Its emitter is a short labyrinth sealed into that wall at fixed intervals. When the water stops, the tape goes flat again, so a taped field looks like black ribbon lying along the row.
Drip line is a round tube with a wall that holds its shape. Its emitters are separate parts, punched or moulded in. On Kenyan plots those parts are button drippers and arrow drippers, fitted through a take-off or pressed straight into the lateral.
In practice, the difference shows up when something fails. Tape fails along a length: a split, a torn lap, a seam gone brittle. Line fails at a point: one blocked outlet, one dripper pushed out of its hole.
Drip tape vs drip line: wall thickness and service life
Thickness is where the two products diverge first.
Tape wall is measured in mils, and one mil is one thousandth of an inch. Penn State extension, in its guide to drip irrigation for vegetable production, puts the working range at 4 to 25 mil, with tape commonly sold at 8 to 10 mil for a single season. The shop lists its own drip tape at 12 mil and 16 mil. Its product note adds the rule that matters: the thicker wall is for permanent subsurface work, the thinner wall for temporary systems on high-value crops.
However, line wall is not measured that way at all. A 16 mm lateral carrying a hard emitter is a pressure vessel first and a water channel second. So its life is set by the UV stabiliser and by the emitter, not by the thickness of a film.
In practice, read the practical version. Thin tape is generally used for one season. A 16 mil tape handled well, and a buried line, can both still be there at the next planting. Consequently the tape that looked cheap in year one can be a purchase again in year two, while the line is only a flush.
Drip tape vs drip line: emitter spacing and flow per outlet
First, spacing decides the wetted band. Then outlet count decides what the field costs.
The shop lists tape spacing at 10 cm, 15 cm, 20 cm, 30 cm, 40 cm and 50 cm, with single or double emitters along the wall. Double outlets discharge more volume per metre, which is what a thirsty crop on wide spacing needs. Extension literature gives 8 to 16 inches as the usual emitter spacing band, and 0.2 to 1.0 gallons per minute per 100 feet of tape as the flow one lateral carries.
Line emitters are bought as individual flow rates instead. The pressure compensation button dripper is listed at 2, 4, 8 and 16 litres per hour. The adjustable button dripper is colour-coded by rate: half a litre red, one litre black, two litres green. Arrow drippers are listed at 2, 4 and 7 litres per hour.
Therefore, before you design, check one flow figure against the shop directly. The tape listing gives 1 to 2.5 litres per hour per emitter in one place, and 1.5 to 3 litres per hour in another. Ask for the flow of the exact roll you are buying, because a 20 percent error in emitter flow becomes a 20 percent error in pump size.
Drip tape vs drip line: pressure and run length
Next, this is the check that ends most arguments.
Tape works at low pressure. The shop listing gives an operating range of 1 to 2.5 bar, and the extension range of 6 to 15 psi lands inside the same window. A middle connector for tape is rated to 16 bar, yet the same product note states plainly that irrigation systems work best at 3 bar and below. The fitting can take far more than the tape needs, and the tape cannot.
In contrast, line emitters want more. The adjustable button dripper is listed at 15 to 25 psi, and arrow drippers at 58 to 80 psi. That is a different hydraulic world. It means a line layout can push water further along one lateral before the last outlet starves.
Run length follows pressure, and this is where a cheap tape becomes an expensive one. A non-compensating tape laid 120 m long delivers more at the head end than at the tail, because friction eats the pressure its emitters need to pass the rated flow. A pressure compensation dripper is defined by the shop as holding its delivery even when pressure changes inside the working range. That property is what makes a long row, or a sloped field, workable.
Short rows on a flat bed: tape behaves. Long runs, slope, or a tank on a stand: compensating emitters on line, as covered in the guide to high volume low pressure irrigation.
Drip tape vs drip line: the specification table
Specifically, both columns use the figures each product carries in the shop.
| Attribute | Tape | Line |
|---|---|---|
| Wall | Flat film, 8 to 10 mil typical, 12 and 16 mil at the shop. | Round tube with a fixed wall and separate emitters. |
| Emitter | Labyrinth sealed into the wall at set intervals. | Button or arrow dripper, punched or take-off fitted. |
| Flow per outlet | 1 to 2.5 litres per hour listed for the shop roll. | 2, 4, 8 and 16 litres per hour on compensating models. |
| Working pressure | 1 to 2.5 bar. | 15 to 25 psi adjustable, 58 to 80 psi arrow. |
| Spacing | 10, 15, 20, 30, 40 and 50 cm, fixed at manufacture. | Chosen at installation, one hole per plant or per station. |
| Season life | One season is normal for thin film. | Multiple seasons while the wall and emitters hold. |
| Sold as | Rolls of 1000 m, 1300 m, 1500 m and 2000 m. | Coils and cut lengths, plus loose emitters and fittings. |
One field read two ways, using the shop’s own figures.
Which one suits your crop rows
Row spacing and crop value decide drip tape vs drip line more than yield potential does.
| Layout | Better fit | Why |
|---|---|---|
| Onions, tomatoes and capsicum on raised beds | Tape | Close rows, a temporary stand, and an interval that matches the plant. |
| Strawberries and nursery benches | Tape | Low pressure, even output over short runs, and the ribbon moves with the trays. |
| Sweet potato and fodder on long flat runs | Tape, with the run kept short | Friction loss along a long lateral is what starves the tail end. |
| Young orchard trees in square basins | Line | One dripper per tree, re-sized as the canopy grows. |
| Hedgerows and greenhouse rows with odd gaps | Line | Emitters sit where the plant is, not where the interval says. |
| Subsurface planting under mulch | Thicker tape or buried line | A 16 mil wall and a protected line both survive work that thin film will not. |
Six layouts, and the product each one rewards.
Two of those rows are worth a second look. For instance, a vineyard or orchard planted for fifteen years is never a tape decision, whatever the invoice looks like. And a bed you will replant three times, after preparing land for drip irrigation, is rarely a line decision, because you will be opening and closing the same laterals all year.
The fittings each system needs
Neither side of drip tape vs drip line works alone. Also, the fitting list is where a budget quietly grows.
Tape needs a starter connector to bring water from the lateral onto the ribbon, a middle connector to join two cut sections, and something to close the far end. The shop lists the 16 mm starter connector, the 12 and 16 mm middle connector and the takeoff connector at KSh 15 each. End plugs run from 16 mm to 110 mm at the same price.
Second, line needs a punch. An HDPE puncher cuts a hole sized to the fitting, and the listing gives dies from 3 mm to 40 mm. A nail or a pocket knife leaves an oversized hole that the emitter cannot seal. Then, at 2 bar, that hole widens every season it is ignored.
Similarly, both need filtration. Extension guidance for tape is a 150 to 200 mesh screen, and the same rule protects line emitters with even smaller passages. Buy the screen before the first blockage, not after. The page on irrigation equipment suppliers sets out what filtration costs against what a blocked field costs.
Drip tape vs drip line: clogging and what to flush with
Every grower gets blockage. Typically one bad particle decides how much of the field stops working. That is the clearest split in drip tape vs drip line.
In tape the labyrinth is part of the wall, so one blocked outlet usually signals a sediment problem that will take the next ten with it. In line the emitter is a separate part, so you can pull one out, clean it, and keep the row running while you decide.
Match the treatment to the deposit, and this is where good intentions do damage. The Arizona extension guide to seasonal maintenance for drip and sprinkler systems is specific that acid addresses mineral build-up, not biological growth. So a white crust at an outlet is a mineral problem, and acid belongs in that flush. Green slime is a biofilm problem, and disinfection belongs there. The two are not interchangeable, and running acid on a biofilm wastes a season of tape.
Then flush. Open the end caps, walk the line, and close them again once the water runs clear, which is the guide’s own test instead of a stopwatch. Our page on clogged drip tape covers the full procedure, including how to isolate one section without flooding the rest of the row.

End of season: what comes off and what stays
This is the check most growers skip. Nevertheless, cost per season is what decides it, and that is where drip tape vs drip line really separates.
Thin tape comes off. It is wound from the beds by hand, and the shop’s product note states the material is recyclable into plastic resins. Winding is labour, and collection or disposal is a cost line you pay in the week everyone else is harvesting. Reuse depends on the wall. A 16 mil tape handled carefully can be laid again, and a 10 mil tape dragged across a stone usually cannot.
In contrast, line stays in place. You flush it, replace the few emitters that dripped, and the lateral is there for the next crop. Instead of a removal crew you budget a morning of walking the field. That saved labour is the reason a permanent line can cost less per season than a cheap tape, even when the tape invoice is the smaller number.
What each costs, and what moves the price
The shop lists drip tape rolls from KSh 8,000 to KSh 14,500, and that spread is a length range before it is a quality range. A 1000 m roll and a 2000 m roll are not the same purchase. So divide by the metre before comparing two quotes, and treat any quote that hides the roll length as uncomparable.
Meanwhile, fittings are small money either way. Connectors and end plugs sit at KSh 15 each, and a puncher is a one-time tool that pays for itself on its first day of clean holes. Emitters are priced per piece, so the count is the real variable. Two thousand plants at one dripper each is two thousand fittings, and a wide interval on tape simply is not.
What moves the total is the design behind both products. Row length decides whether you need compensating outlets, spacing decides outlet count, and your water source decides filtration. System-level pricing belongs to the page on what a drip irrigation system costs in Kenya, so this page keeps to the two products and their parts.

Drip tape vs drip line: the 8 proven checks in order
Work down this list with your own numbers on paper, in this sequence.
- Measure the longest run you intend to lay, in metres, and keep a tape run short enough that friction cannot starve the tail.
- Check the pressure at the field rather than at the pump, then compare it with 1 to 2.5 bar for tape or 15 to 25 psi for a compensating dripper.
- Fix the season count you actually want, and choose the wall thickness from that answer instead of from the invoice.
- Set emitter spacing from the crop row, then confirm the shop stocks that interval in the roll length you need.
- Ask for the flow rate of the exact roll or the exact dripper, and write the number down before designing.
- Count outlets per plant, multiply across the plot, and only then compare two quotations.
- Size filtration to the smallest passage in the system, and install it before the first blockage rather than after.
- Plan the end of season now: who winds the tape, what stays in the ground, and where the flush water drains.
Four mistakes that cost a whole season
These four mistakes decide drip tape vs drip line the wrong way. An installation crew sees each of them twice a season.
- Laying tape on a slope and expecting uniform delivery, when the low end sees pressure the film was never rated for.
- Buying the cheapest roll for a plot that will be planted three more times.
- Punching line holes with a nail, then blaming the emitter for a leak the hole caused.
- Flushing with acid because a neighbour did, on a blockage that was slime and needed disinfection.
Frequently asked questions
Which is better, drip tape vs drip line?
Neither, and the question is the wrong shape. Tape suits close rows, short runs and a stand you will pull at season’s end. Line suits trees, wide spacing, long runs and slope. Your plot picks the product, and the eight checks above are how you make that pick without guessing.
How long does drip tape last in Kenya?
Thin film is generally a one-season product; Penn State’s drip guide for vegetable production puts typical tape at 8 to 10 mil. A 12 or 16 mil wall lasts longer, and buried tape outlives tape lying in full sun. Sun, careless handling and rodents shorten all of them. Therefore, ask for UV-stabilised stock by name.
Can drip tape go under the soil?
Yes, with the thicker wall. The shop’s own note puts 16 mil tape at permanent subsurface work. However, you then lose the thing that makes drip easy to audit, which is a visible wetting pattern. So flush on a schedule, filter harder, and expect to find a blockage by yield loss instead of by sight.
Are the fittings the same for both?
No. Tape runs on starter and middle connectors that grip a flat seam, and line runs on punched holes, take-offs and press-fit emitters. End plugs are shared, and both need the same screen filter at the head of the system.
Can either run from a raised tank?
Tape suits gravity well, because 1 to 2.5 bar is a modest head to build, as the page on pump for drip irrigation explains. Check your tank height against the run before ordering. Compensating emitters help a tank-fed layout in a different way: they hold delivery as the tank drains and pressure falls, which a plain outlet cannot do.
Can I use drip tape vs drip line on one farm?
Yes, on separate zones with their own valves, because the two want different pressures. Never on one lateral. A taped block and a lined block fed from the same sub-main will leave one of them running at the wrong pressure all season, and the tape pays for it first.
Where to take this next
Finally, two pages finish the job this one starts. The hub on irrigation in Kenya places drip among the methods worth comparing, and the page on the advantage of drip irrigation system argues what the method buys you once it is installed. For the parts themselves, the shop lists drip tape by wall and roll length, with the button drippers and arrow drippers that turn a lateral into a line. For the whole setup rather than one product, read the guide to the best drip irrigation system, and for the third option in that family see drip tape vs rain hose.