

Table of Contents
Takeoffs as irrigation equipment are the smallest parts of a drip system and the parts most often chosen wrong. A takeoff carries water from the main pipe into the line that runs along your crop. Size it and seal it correctly and the row below it performs. Get it wrong and no amount of good tape saves the harvest.
This page covers how to choose takeoffs as irrigation equipment, how to match each one to the line it feeds, how to seat it in the pipe without a leak, and the two situations where the fitting is the wrong answer.
What takeoffs as irrigation equipment do
Takeoffs as irrigation equipment are a bridge.
Water travels under pressure inside a polyethylene mainline. The crop needs it at a trickle, in a thin wall tube or a tape laid on the soil. The takeoff is the joint between those two worlds. One end is a barbed stem that grips the inside of the lateral, and the other is a body that clamps onto the hole in the main pipe.
Most units sold here are black, with a lock collar in blue or yellow. Typically the collar marks the size range, not the brand. Farms also call the part a take off, a drip takeoff, or a barbed fitting, and the shop lists it as a takeoff connector. Same part either way, and the same three failure points.
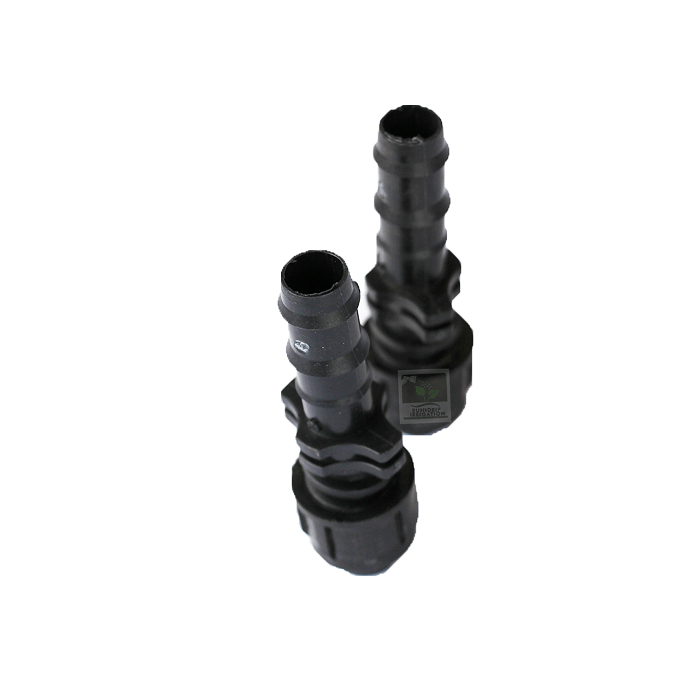
The three parts a takeoff needs
Takeoffs as irrigation equipment rarely work alone.
Three other items decide whether it holds. The first is the punch, which cuts the hole in the sub main. Our pipe punch is sized to the hole, not to the pipe. The second is the grommet rubber, which seals the drilled opening so the body does not sit on bare plastic. The third is the drip start connector, used where one hole must feed two directions.
Skipping the grommet is the usual shortcut. It holds for a season, then weeps. Because a weeping joint releases the pressure the far end of the line depends on, the leak shows up as a dry row twenty metres away.
Sizing takeoffs as irrigation equipment to your line
Size to the line, not to the pipe.
The barbed stem goes inside the lateral, so the stem must match the inside of that tube. Most drip tape and drip lines supplied here carry an internal diameter of 16 mm, which is exactly why the 16 mm takeoff is the common size in the market. Smaller stems of 8 mm and 12 mm suit micro tube and the thinner wall hoses used in nursery rows.
| Stem size | What it grips | Where it is used | How it fails |
|---|---|---|---|
| 16 mm | Drip tape and 16 mm line | Standard sub main to lateral joint | Too fat for thin wall hose |
| 12 mm | 12 mm poly pipe | Short laterals and nursery beds | Starves a long taped run |
| 8 mm | Micro tube and small hose | Pots, greenhouse benches, seedling rows | Cannot feed a field lateral |
Of the takeoffs as irrigation equipment stocked here, one size is offered as a variant today: the 16 mm unit. Therefore, if your layout calls for 12 mm stems, confirm availability before you cut holes for them. The nominal tape diameters in use here are 12 mm and 16 mm, and a stem sized to neither will leak or kink.
Why the mainline diameter decides the result
The pipe matters more than most growers expect.
Every takeoff pushed into a small mainline takes bore away from that mainline. In a 20 mm or 25 mm sub main, a long row of takeoffs leaves little water to reach the far end. The last lines run dry while the first lines flood, and the pattern repeats on every run of the same diameter.
A larger supply pipe is the fix. More pressure is not, because extra pressure only forces the same volume through a smaller passage faster and pushes the joints past what they seal. This is the decision we make first when designing a drip system for a plot, and it is the reason a pump upgrade often disappoints. Our page on buying a pump for drip irrigation covers what a pump can and cannot correct.
Pressure ratings, 16 bar and 3 bar
Read a rating twice.
A standard takeoff sustains a working pressure of up to 16 bar. Most irrigation systems in Kenya work best at three bar and below. The 16 bar figure is not a target. It is the margin that keeps the body intact when a valve slams shut and the water hammer arrives.
The rating does drive one design choice. A line run at high pressure needs pressure compensated drip line, not a non compensating one. The drip maintenance bulletin from UA Cooperative Extension is blunt on this point. Where the tape does not compensate, pressure regulating valves are not optional. The line changes its output with whatever pressure it sees, so the fitting rating and the line type have to be decided together.
Likewise, a takeoff rated far above your working pressure is not a better purchase. It is the same part at a higher price.
How to punch and seat a takeoff
Cut a clean hole.
The hole quality decides the seal, and the seal decides whether the row below it gets water. Work one section at a time so the line stays pressurised where you are not standing.
- Mark the spot where the lateral will leave the main.
- Punch it, then turn the blade a quarter turn and pull it straight out.
- Never twist the punch sideways, because an oval hole cannot be sealed by a round grommet.
- Push the grommet in first, then the takeoff body.
- Wet the barbs and push the lateral on to full depth.
- Bring the system to working pressure before you cover the joint.
A tight barbed joint is the point of fitting takeoffs as irrigation equipment. Because a loose barb is how soil gets into a line every time someone moves a lateral, the same fitting that leaks water also lets grit in. A screen filter at the head catches most of it, and our irrigation water filters page lists the sizes we fit.
Installing takeoffs as irrigation equipment along a slope
A slope is a pressure map.
Downhill, pressure builds and the lower lines deliver more than their share. Uphill, the same fittings deliver less. On non compensating tape that gradient appears as a wet strip and a dry strip on the same contour, and growers blame the tape. Specifically, count the outlets on the uphill half and expect a lower flow at each one.
Two options fix it. First, buy pressure compensated line and let the fitting do the work. Second, break the slope into shorter runs, each fed from its own takeoff rather than one long line pulled from the top. In practice, the second option costs labour and the first costs a little more per metre.
Takeoffs as irrigation equipment versus a drilled hole
A nail hole is not a takeoff.
Some growers pierce the main and push the tape straight in. It costs nothing, and it leaks water and soil in equal measure. A punched hole with a grommet keeps its shape each time a tube is pulled out and refitted. A pierced hole widens instead, and a widened hole is one of the ways a line fills with grit. Our guide to unblocking a clogged drip tape covers what that grit does once it is inside the outlets.
There is one honest exception. Where a lateral is temporary and will be pulled at the end of the season, a drilled hole is a reasonable trade. Then treat the main as the part you are protecting, not the tube.
Five failures that start at a takeoff
All five are visible if you look.
- A stem sized to the main pipe instead of the lateral.
- A grommet skipped, so the joint weeps after one irrigation.
- A hole torn oval by a twisted punch, which no collar can close.
- Too many takeoffs on a small sub main, starving the last rows.
- A lateral pushed onto dry barbs, then pulled off again and again.
Each of these shows at the far end of a row, which is why the tape usually gets the blame. Then the grower replaces tape that was never the problem, and the new tape fails the same way.
What a takeoff costs and how many to order
Price is not the decision when you buy takeoffs as irrigation equipment.
The shop lists the 16 mm unit at KSh 15, marked down from KSh 20. At KSh 15, one hundred outlets cost KSh 1,500, which is less than a roll of tape and far less than one row lost to a dry patch. Treat that as a ratio, not a quote, because fittings prices move with the exchange rate.
Order the punch and the grommets with the first batch, not after the first leak. Additionally, take about 10 percent more takeoffs than your layout counts. Some will be dropped in the soil before the season ends, and a runner who stops to hunt for one loses an afternoon.
A check that catches a bad takeoff early
Catch it in week one.
Walk the plot with the system at working pressure and put a hand on each new joint. A weeping takeoff feels like a cool film of water on the collar. Next, compare the flow at the head and at the tail of the same line.
That same bulletin puts the trigger at about 10% under the rate a line was designed to give. A smaller shortfall is ordinary variation. As a result, a large gap on one line only, with every other line normal, points at one badly seated takeoff, not a failed tape. Fix the joint before you treat the line.
For the rest of the season, the layout and the kit matter more than the fitting. See what we supply in our drip irrigation kits, and how land preparation for a drip line changes what reaches those joints in week one. Trickle systems as a method are described in this overview of drip irrigation.
Frequently asked questions about takeoffs as irrigation equipment
What size takeoff do I need for drip tape? Match the stem to the inside of the tape. Most tape supplied here has an internal diameter of 16 mm, so the 16 mm takeoff is the default. A stem smaller than the tube will not hold, and a stem larger than the tube will kink it.
Can I install a takeoff without a grommet? You can, and it will leak within a season. The grommet seals the drilled hole in the main so the body sits on rubber and not on cut plastic. It costs less than the takeoff.
How many takeoffs can one mainline carry? As many as its bore can feed. Each fitting narrows the passage, so a long row of them on a 20 mm or 25 mm sub main leaves little water for the last runs. Size the main first, then count the outlets.
Will a 12 mm takeoff fit 16 mm tape? No. The stem has to grip the inside of the lateral, and a 12 mm stem in a 16 mm tube leaves a gap that leaks back into the soil. Use the size that matches the tube.
Do takeoffs need a filter upstream? Not for their own sake, but the outlets they feed do. A takeoff is a passage, and everything that passes through it continues into the tape. A screen at the head protects the whole run.
Is a takeoff the same as a drip start connector? They join the same two worlds. A start connector usually carries two barbs from one hole, so laterals run both directions, while a takeoff feeds one line. Choose by how many directions you need from that point.